Preparing and Uploading Your Roster File
Last updated: July 9, 2026
What is a Roster File?
Your roster file is an Excel or CSV spreadsheet that tells the platform who will be taking your surveys. For example, student surveys require a roster file that lists each student who will be taking the survey. A roster file helps ensure that all respondents receive a survey for their correct school, district, or teacher; whichever is the subject of the survey.
Please note that Panorama Student Life Skills & Well-Being Measures - About Self survey does provide student-level reports. All other surveys are reported at the classroom, school-level or district-level.
As a best practice, please complete the survey set-up process 2 to 3 weeks prior to your intended launch date. This gives Panorama’s technical teams time to troubleshoot any issues.
Note: Districts and Schools whose Student Information System (SIS) is integrated with Panorama can use our Successports functionality. Successports allow you to load student roster data from Student Success when setting up your survey. Learn more about this functionality in Panorama Academy.
Download a Roster File Template
To ensure that your roster file is automatically understood by our system, we recommend that you download the appropriate roster file template and use it to format your data. If you are not the one who will upload the final file, please download the correct template and send it to your district or school's data team, who can provide you with the correct data to upload. You'll also find these files in the platform.
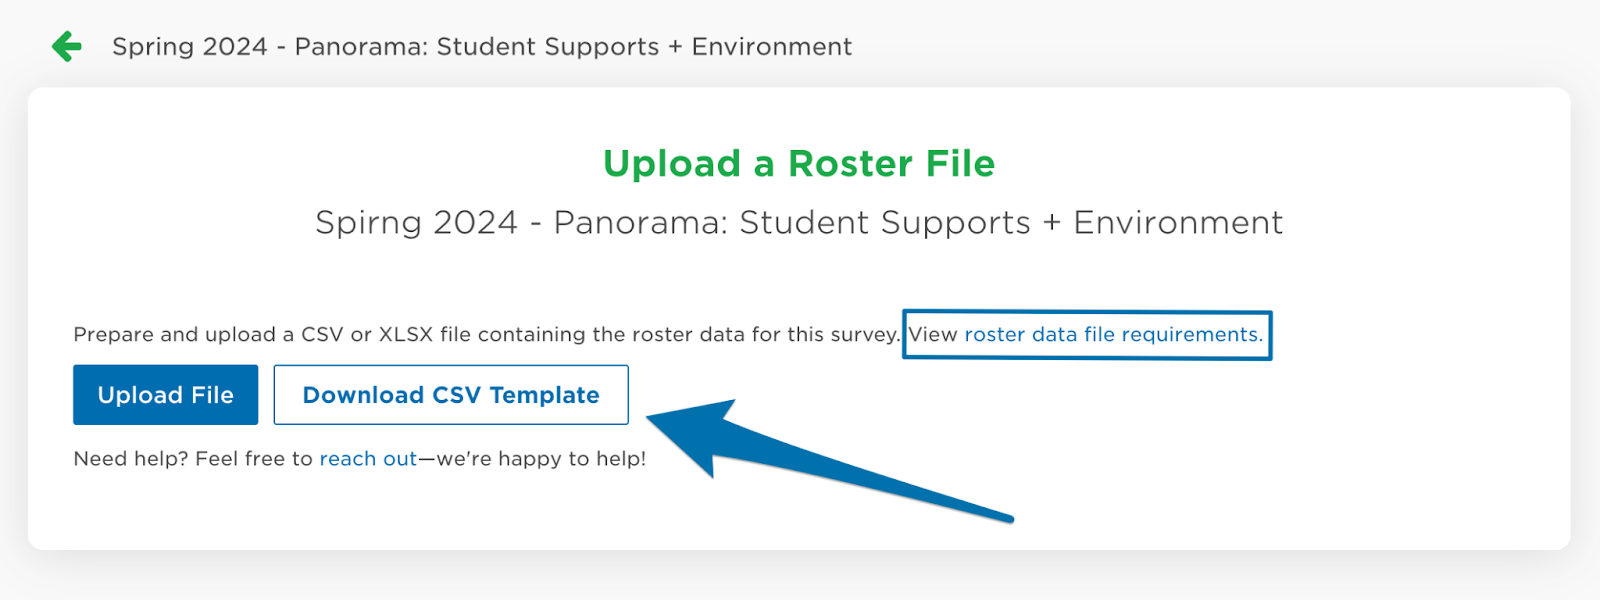
Download the roster template for the survey you plan to administer.
Panorama allows two different types of survey administrations: confidential and anonymous. While both types meet Panorama's security practices, the surveys differ in the ways that you set up and take surveys:
When running confidential surveys, you have access to better response rate tracking and more advanced options to disaggregate results.
When running anonymous surveys, you can collect responses without uploading any individual data, especially for family surveys where the available contact information may not be as reliable. In order to disaggregate the data, you can have survey respondents self-report their demographic information which can be then be used to further breakdown your survey results. Learn more about the types of surveys and how to make the right decision for your survey program below.
[Survey Respondent] About [Survey Subject]
| |
Confidential Survey | Student Surveys About Students
|
Confidential Survey | Student Surveys About the School
|
Anonymous Survey | Student Surveys About the School
|
Confidential Survey | Student Surveys About Classroom
|
Please note: If you would like students to receive their survey links via email, you must upload Student Emails in these files. You can read more about survey delivery options here.
[Survey Respondent] About [Survey Subject]
| |
Confidential Survey | Teacher and Staff Surveys About School
|
Anonymous Survey | Teacher and Staff Surveys About School
|
Confidential Survey | Teacher Surveys About Students (Teacher Perception of Student)
|
[Survey Respondent] About [Survey Subject]
| |
Confidential Survey |
|
Anonymous Survey |
|
Please note: If you would like family/guardians to receive their survey links via email, you must upload Guardian Emails. You can read more about survey distribution methods here.
Data Quality Checklist
While preparing your roster file, we encourage you to use our Roster File Data Quality Checklist, which provides step by step instructions for cleaning up your roster file and making sure the data is uploaded correctly.
Upload Your Roster File
You can use our Rosters Tool to securely upload student, staff, and family roster files and perform preliminary data integrity checks to ensure a smooth survey administration. In addition to performing an initial review of your data file, this tool minimizes the transfer of sensitive information via email.
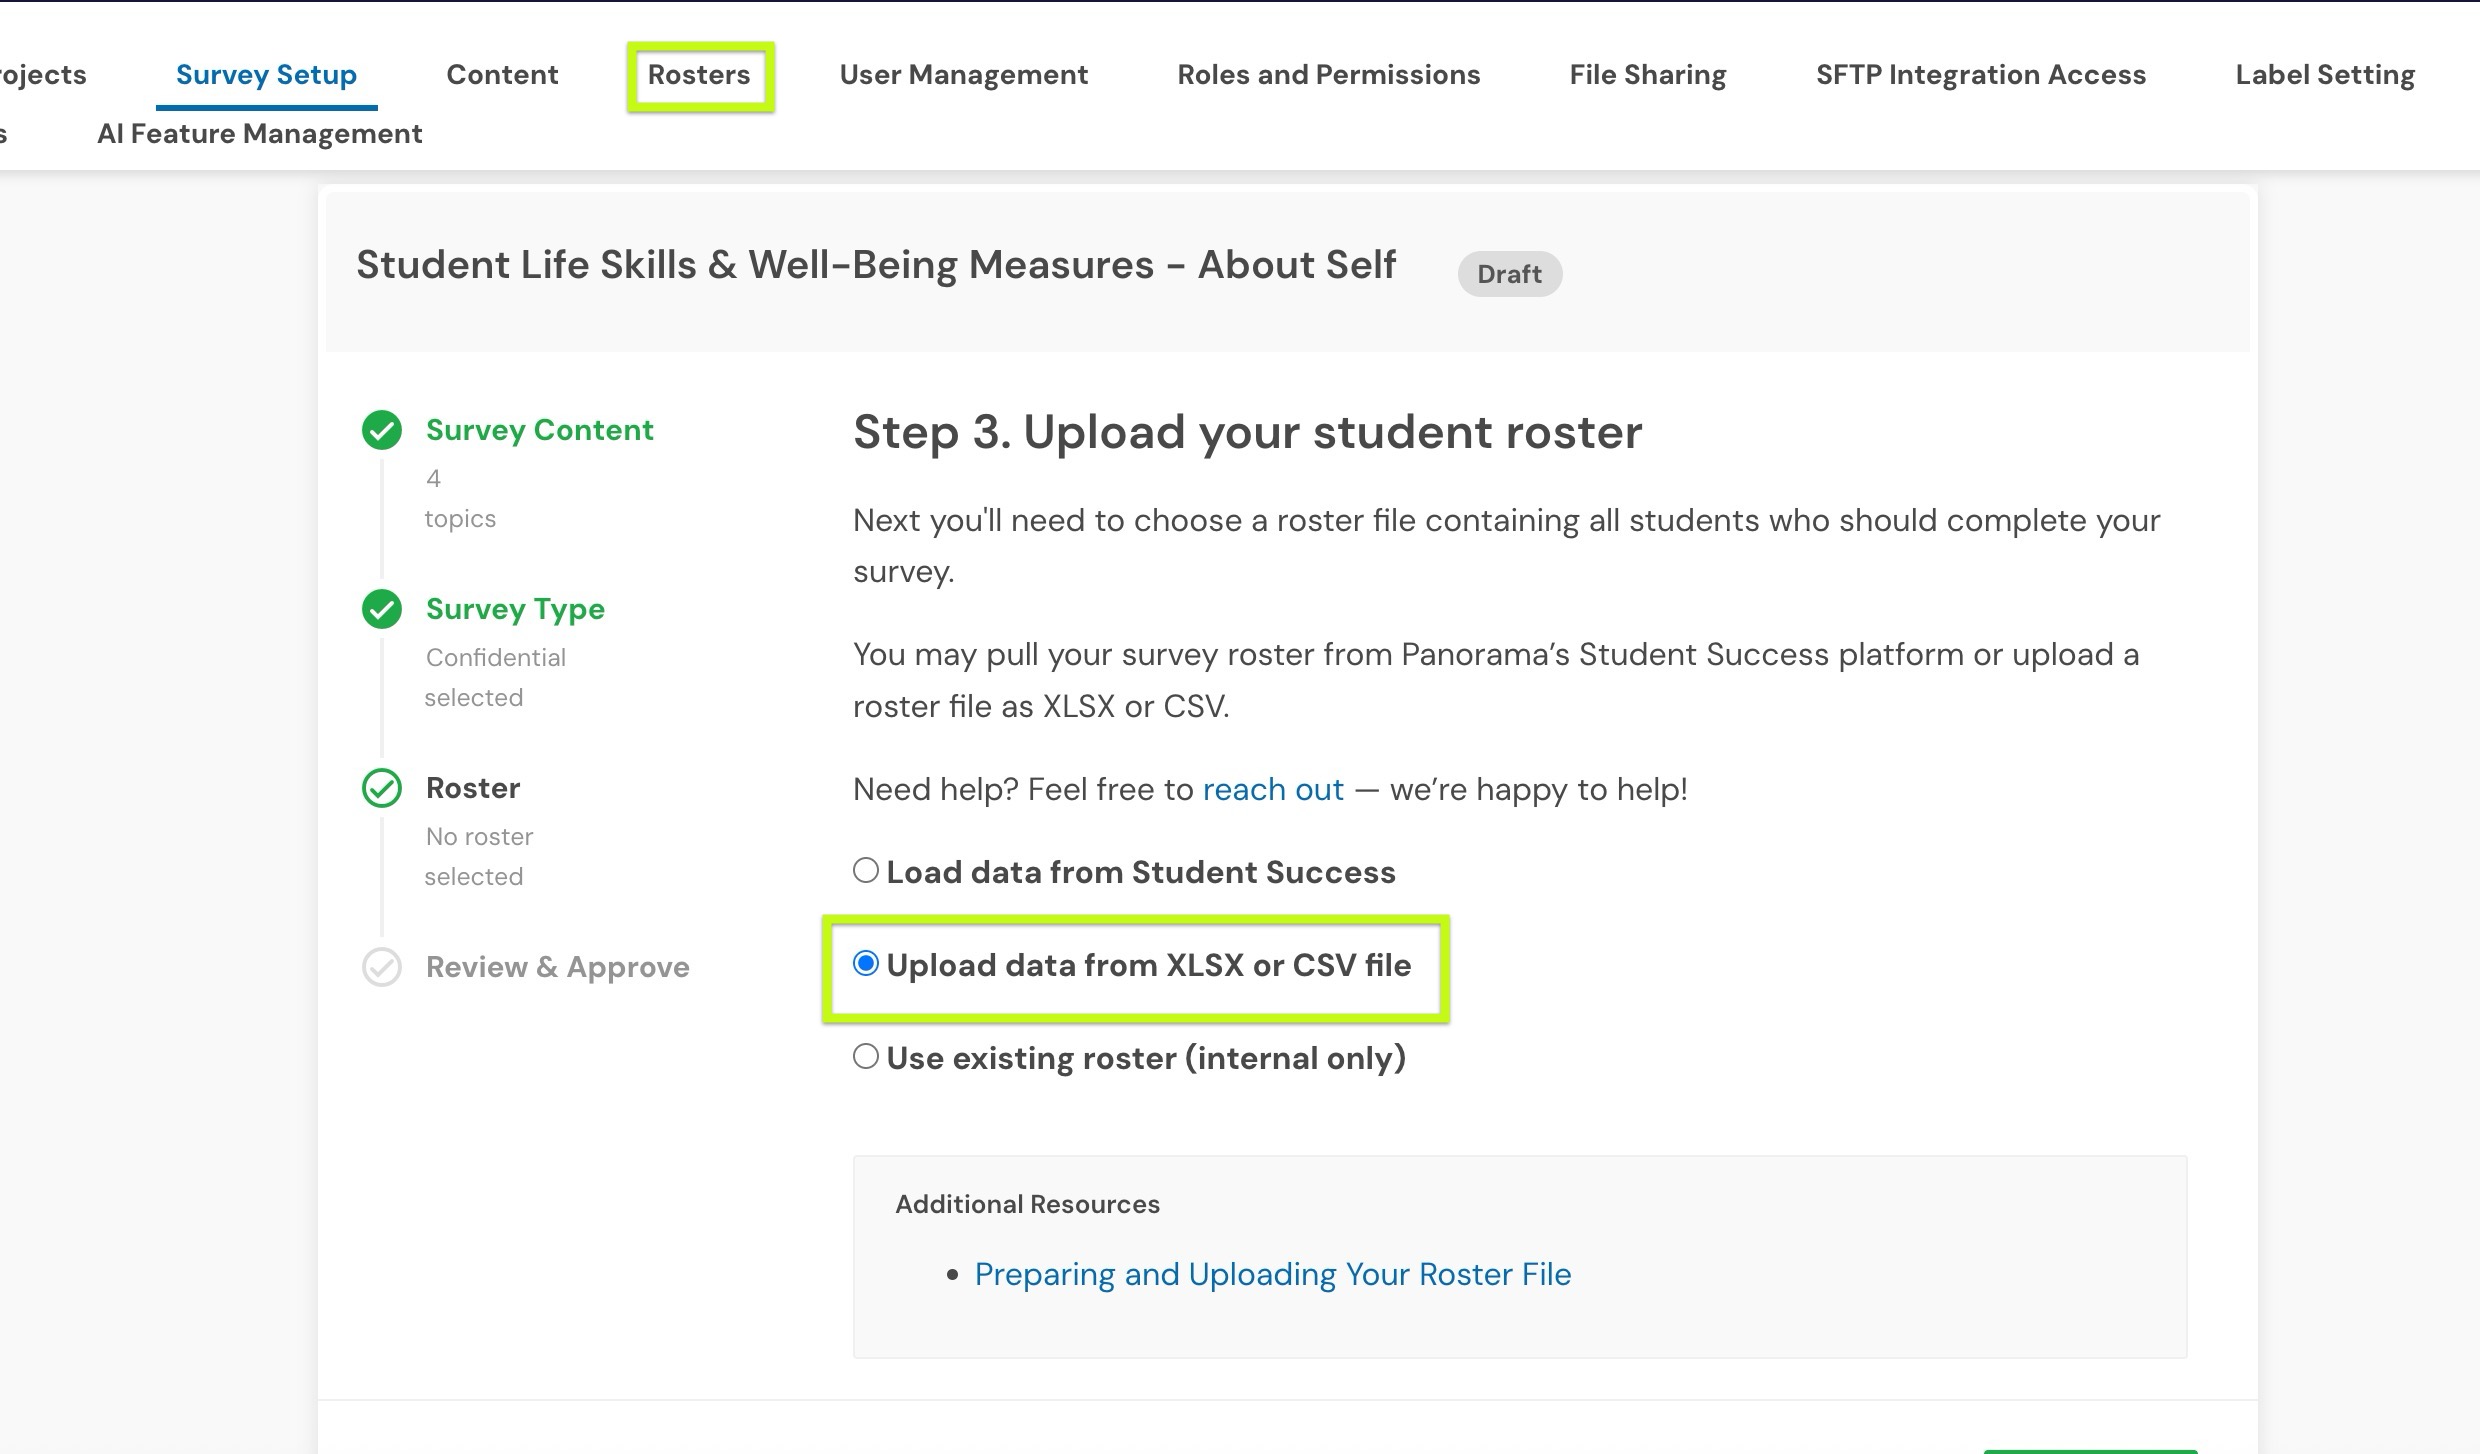
You can navigate to the 'roster upload page' when you are setting up a new survey or by clicking the 'Rosters' tab at the top of your page (Figure 2.).
Once you have selected your roster upload location, select Upload file.
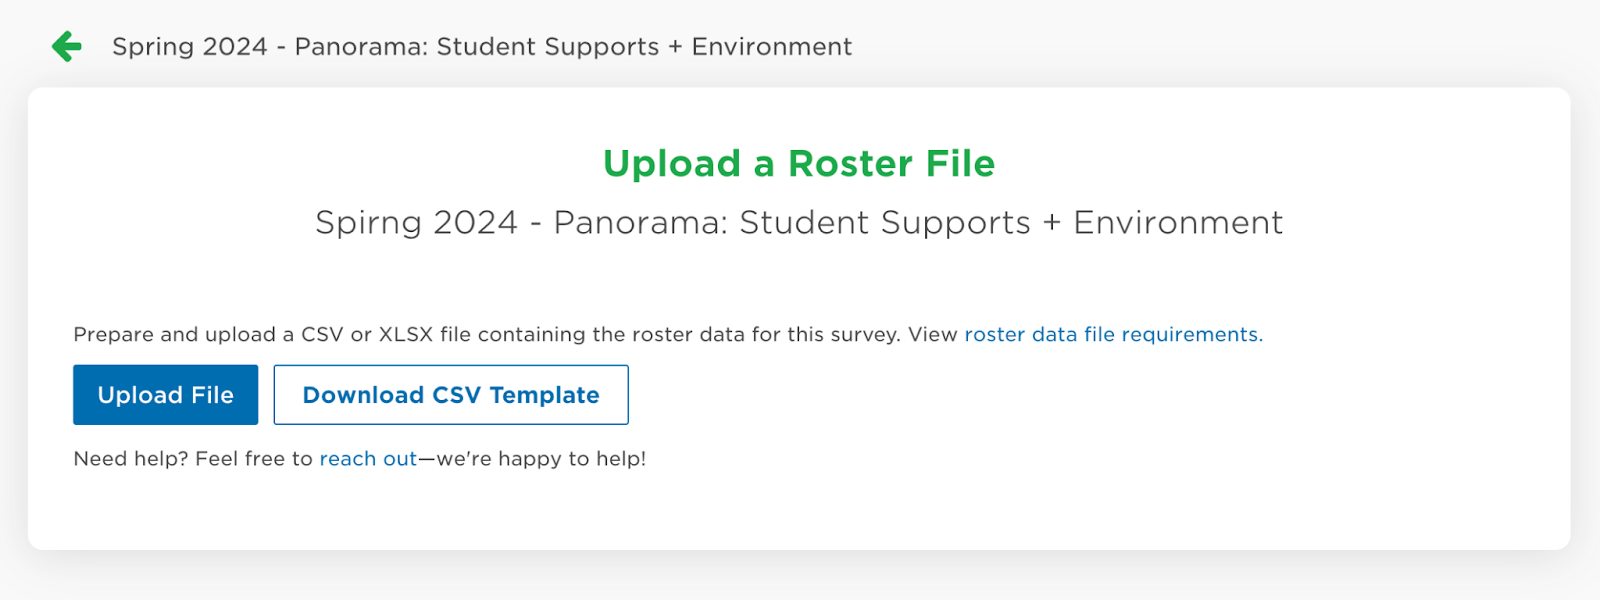
After selecting Upload File, a window will appear listing the required columns needed in the file and an area to click and upload your CSV file. The required columns are determined based on the roster file template selected. Drag and drop the file or click choose a file to upload.

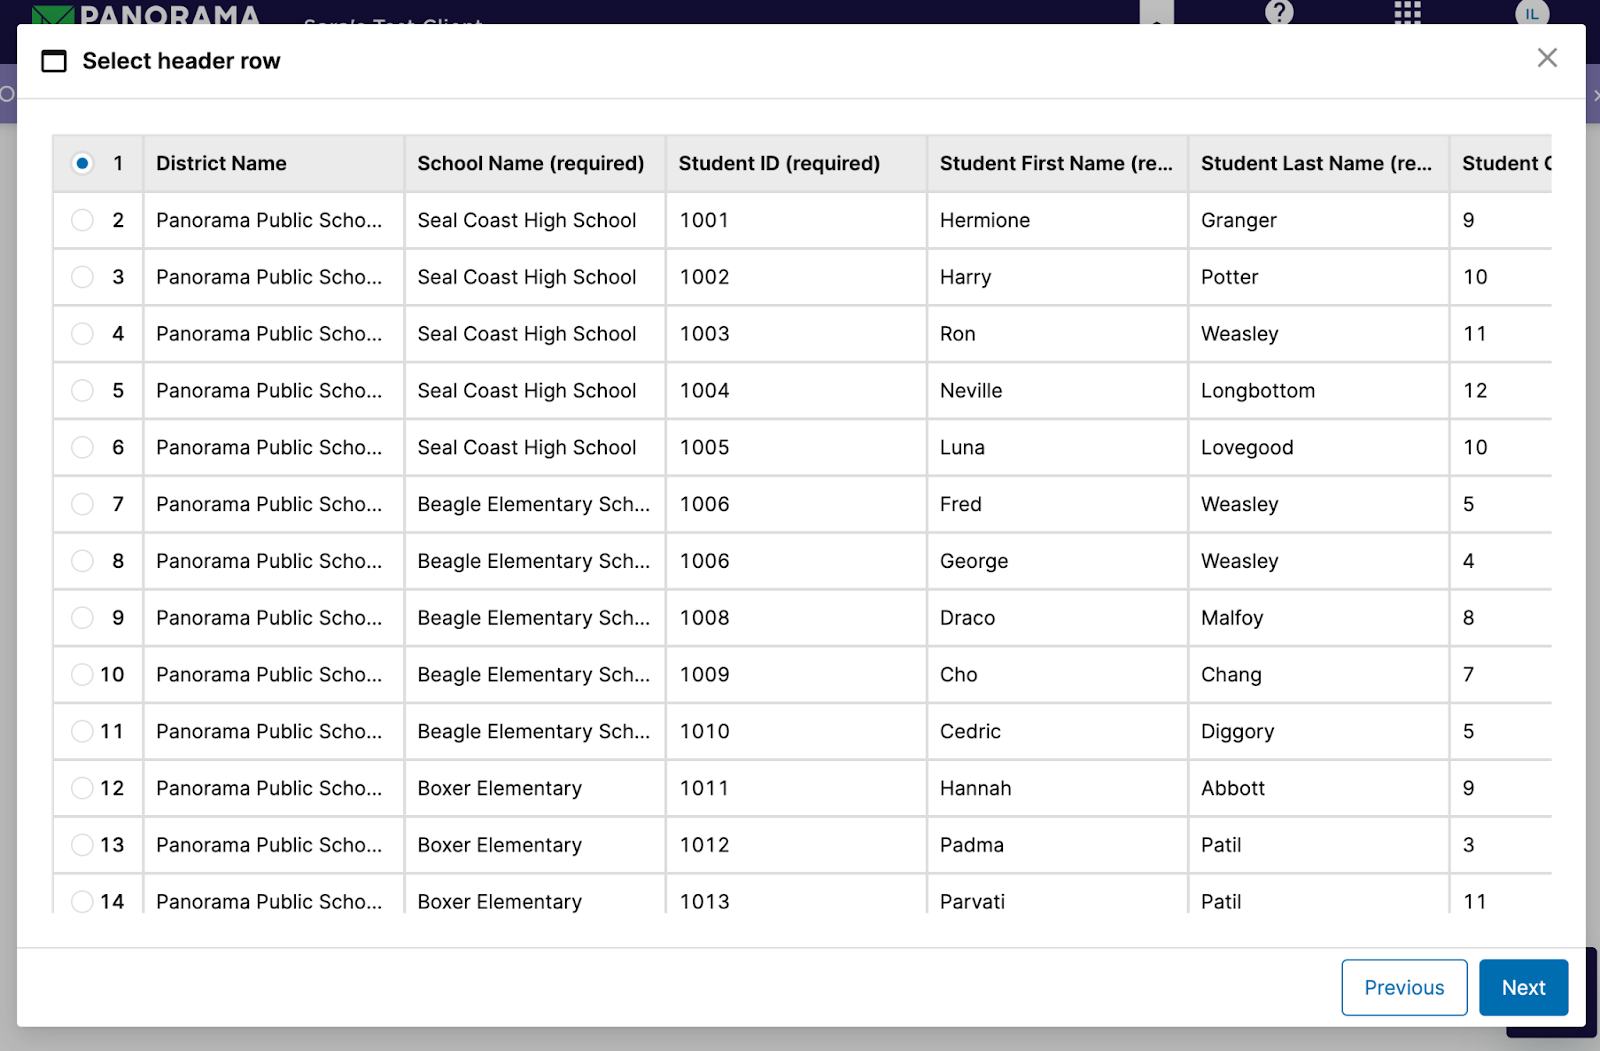
Once the CSV file is uploaded, select the correct row that indicates the file’s correct header row. Then, click Next.
Once you’ve confirmed your headers, you’re ready to map! Column mapping is required to describe what data is represented in each column. For example, student grade levels should appear in the 'student grade level' column when mapped correctly, student names, in the 'student name' column. Use the drop-downs to categorize each of the column titles from your file when you are mapping.
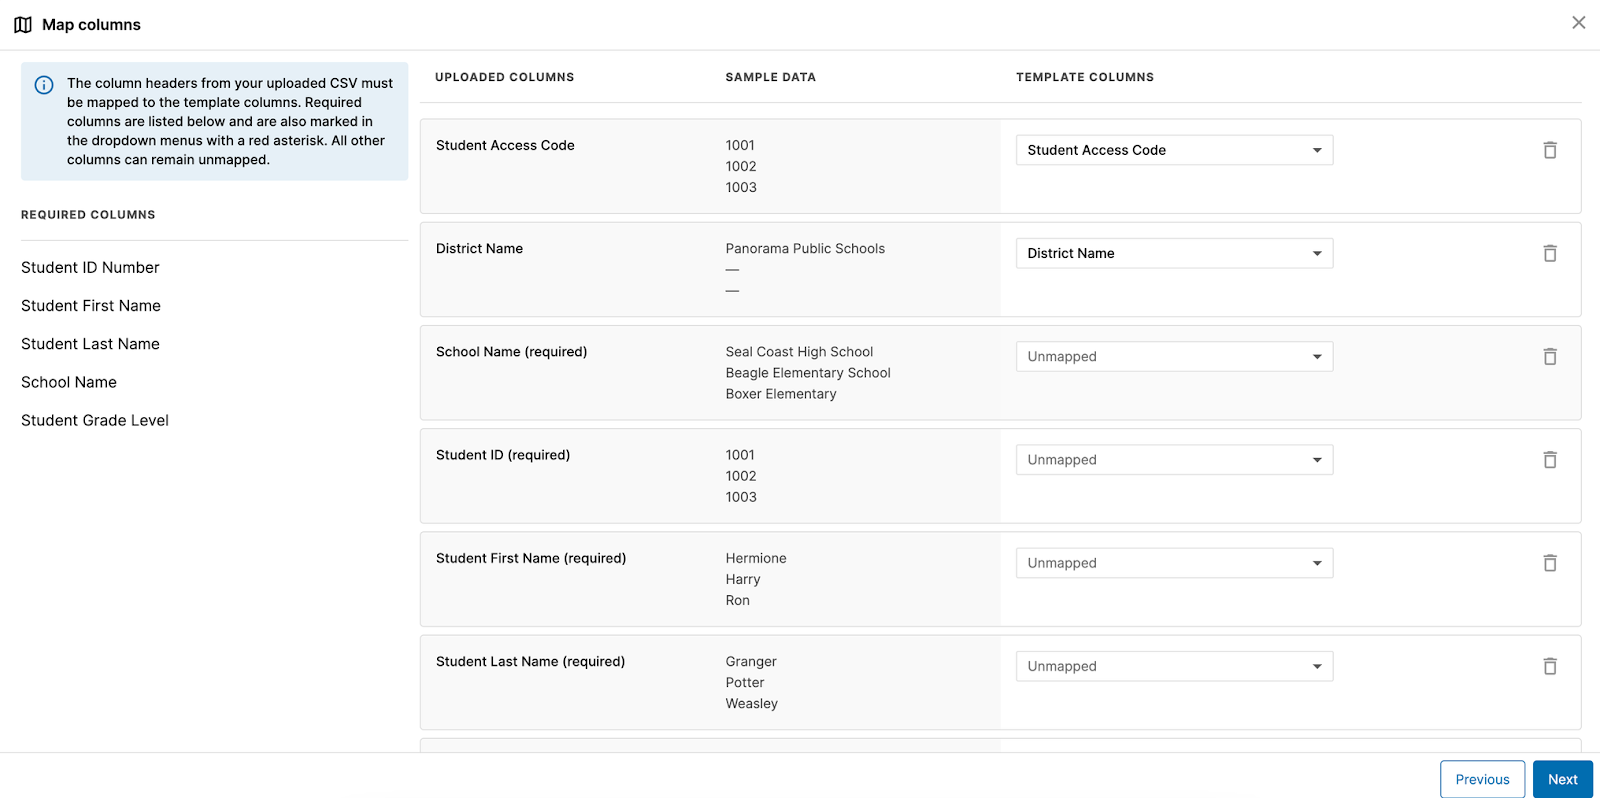
On this page, you will see the uploaded columns, sample data, and the corresponding template columns. Required columns must be mapped to continue to the next step. All other columns can be left unmapped or removed by clicking on the trash bin icon. To continue, ensure all required columns are mapped.
If uploaded columns have been labeled as Unmapped, manually map the columns by selecting the dropdown in the corresponding template column.
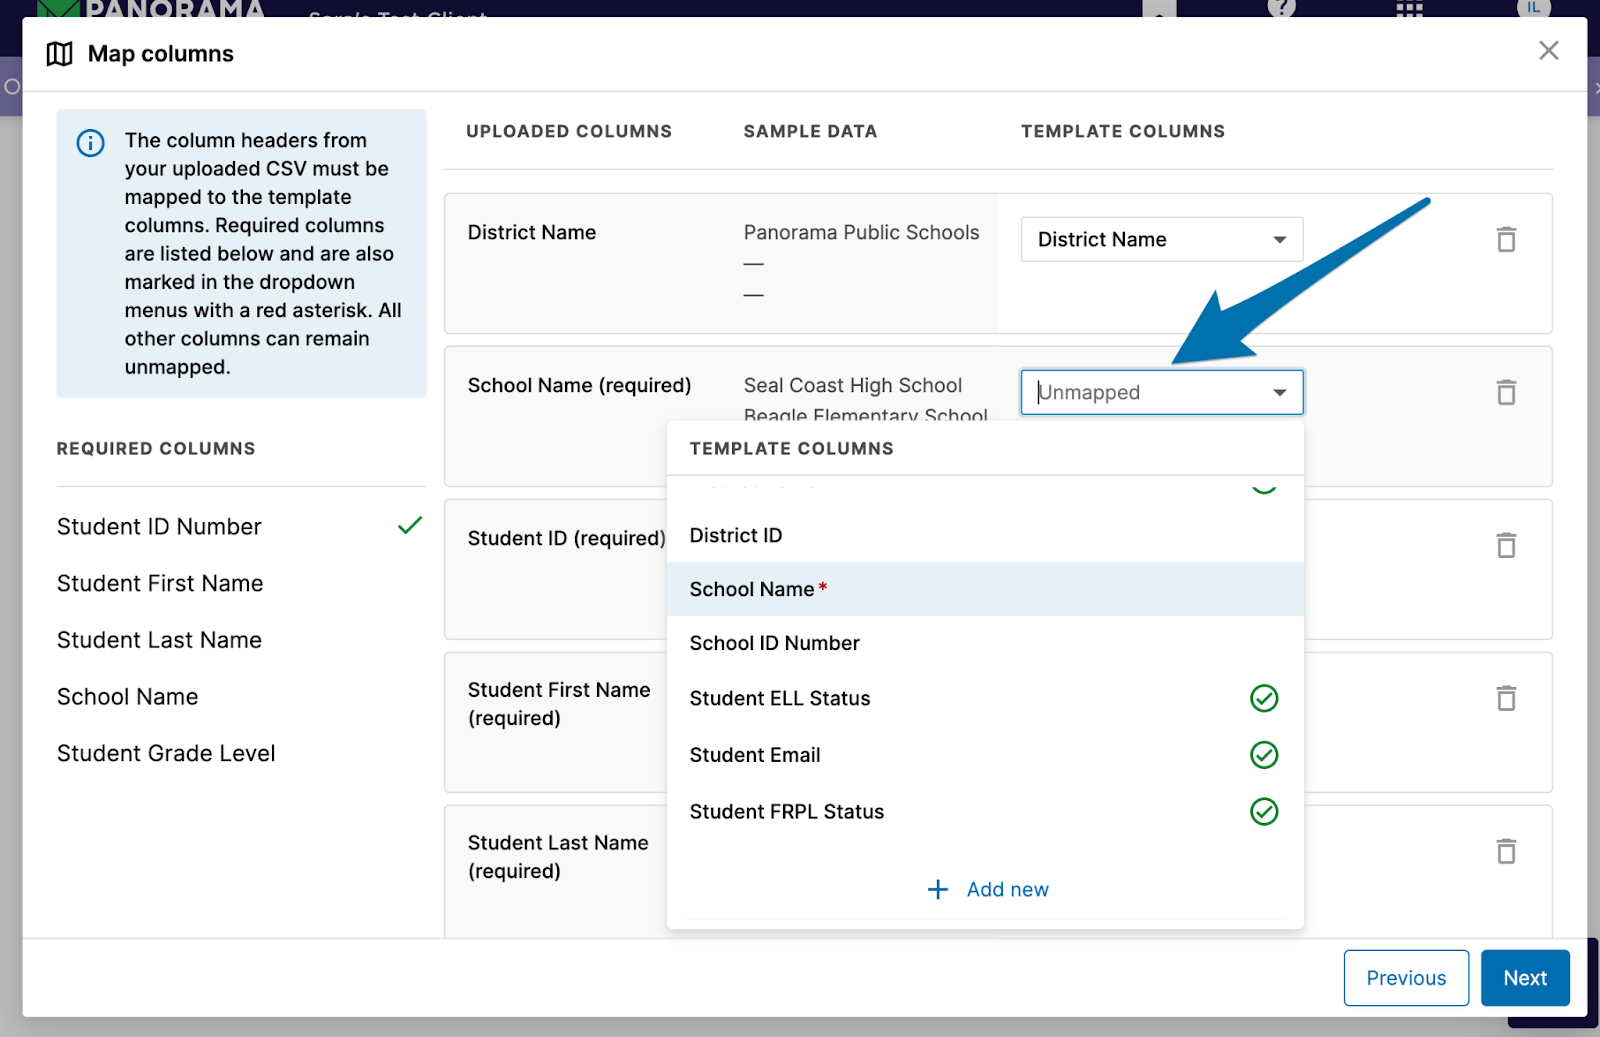
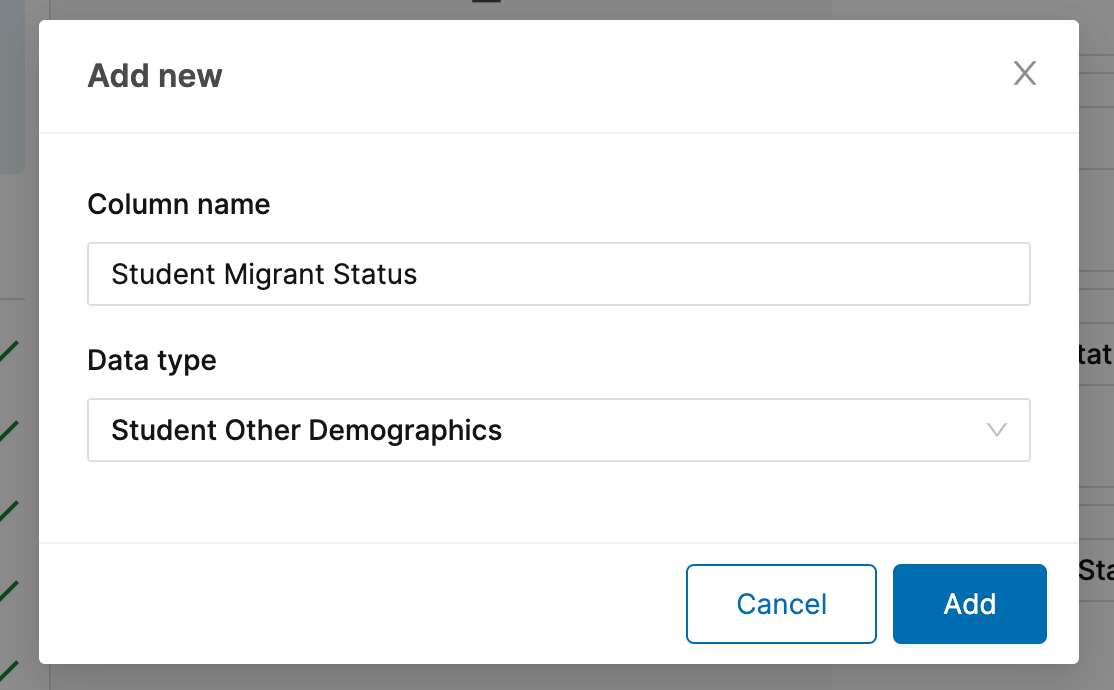
If a column name is missing, add a new column name by clicking + add name. Type in the new Column name and select the Data type.
Note: Uploading an additional new roster for surveys that are open, will not automatically create new surveys for students. To add students to a new survey, please review the Panorama Academy article.
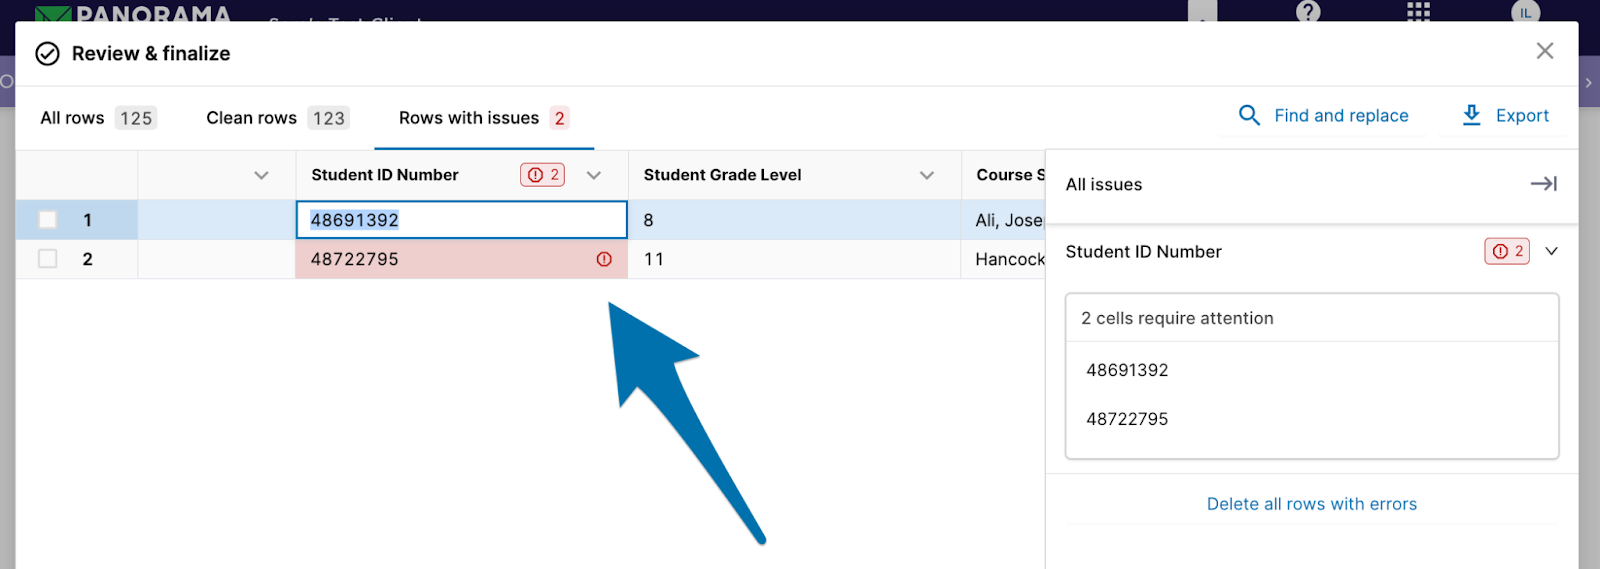
Reviewing and finalizing data
Once the data file has been mapped, you can check for any errors or inconsistencies in the data. If any errors are detected, the tool will clearly indicate them, allowing you to review and correct them before proceeding. If it is your first time uploading, you may receive a yellow warning that indicates that your schools are not yet in the system. You can ignore this yellow warning if it is your first time adding schools to the Panorama system.
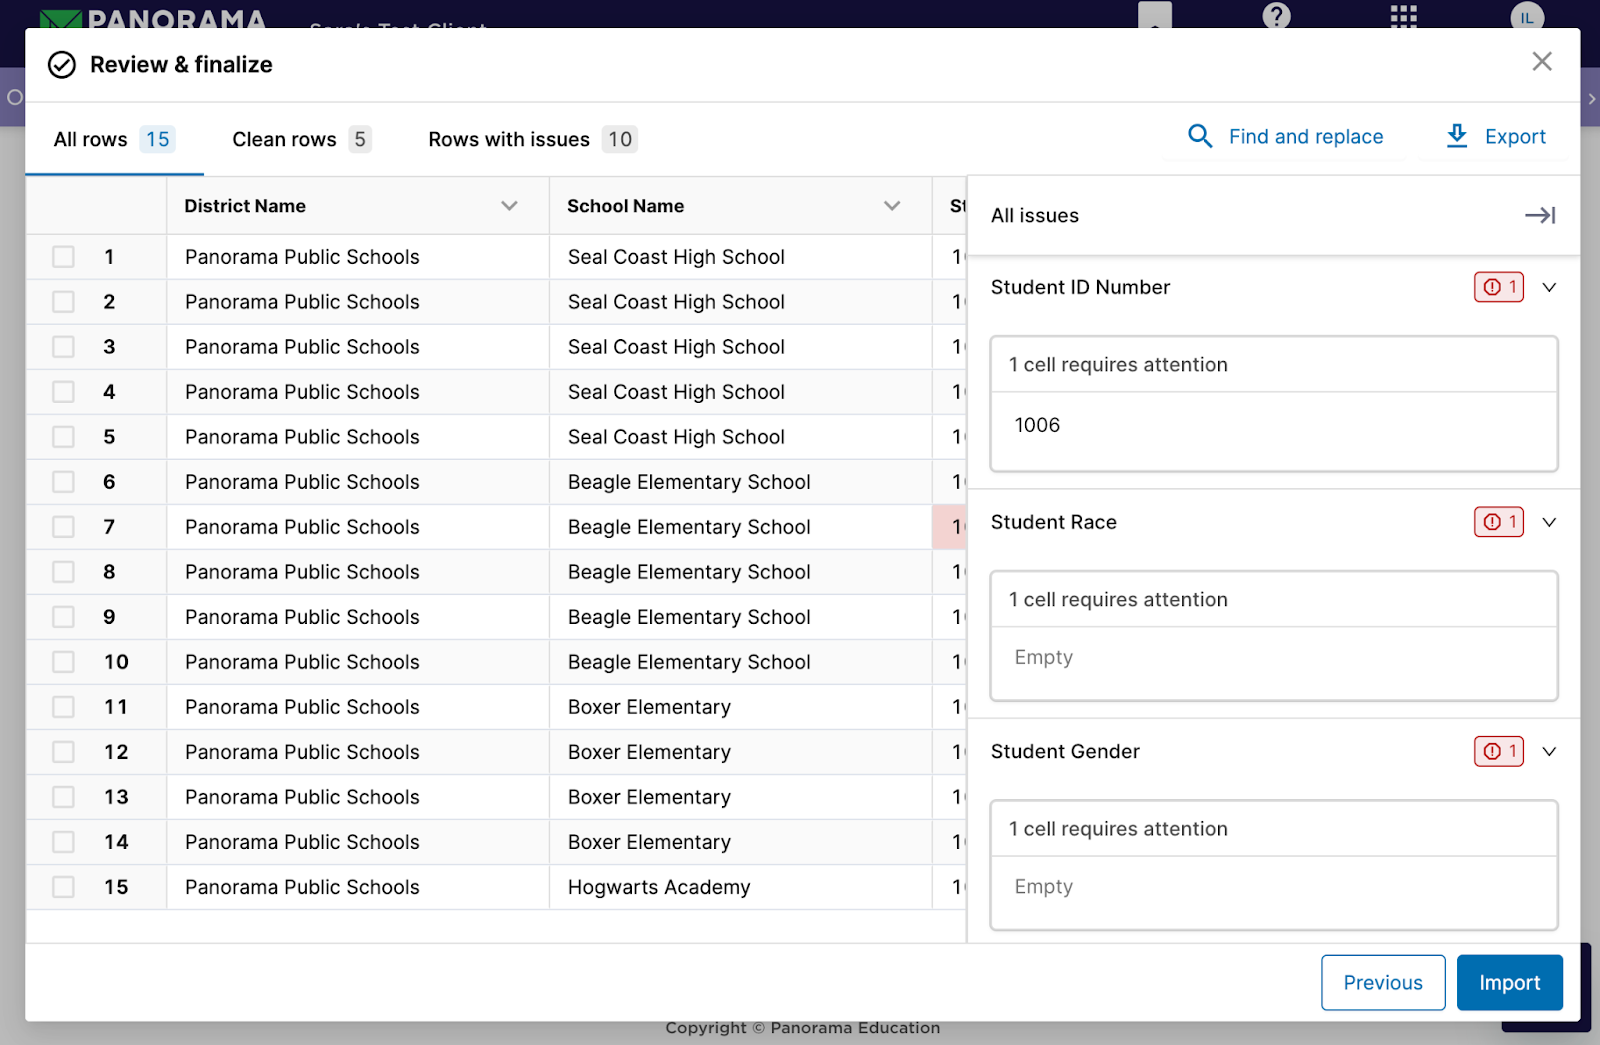
To identify and review errors, you can either edit the cell directly, select the Rows with issues tab or review the All Issues sidebar. You can also use Find and replace in the top right of the screen to quickly find and correct errors.
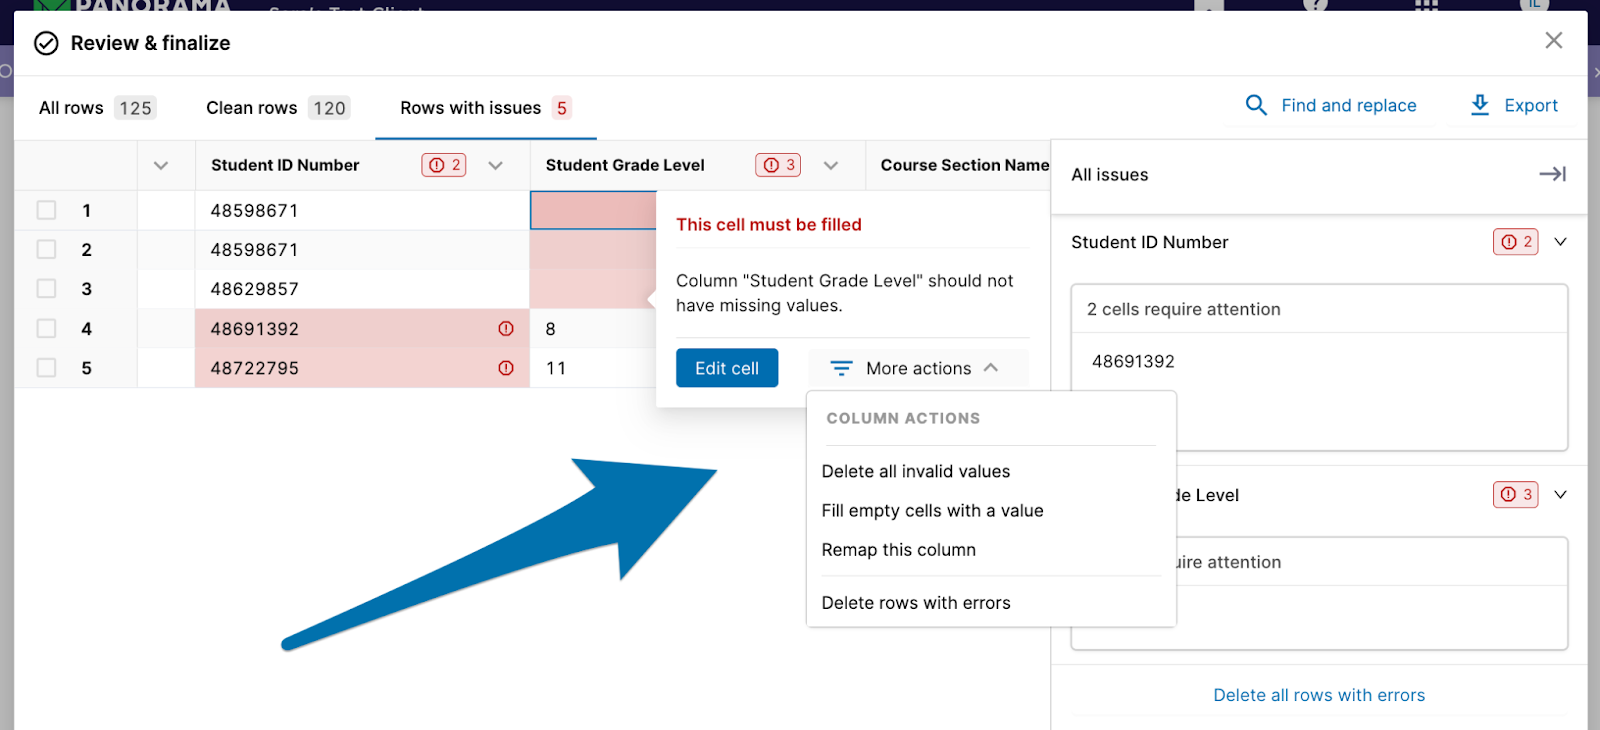
If there are any problem rows, they will be marked with a highlighted cell. You can either directly edit the cell or use the More actions option to make bulk changes to the file. These changes may include remapping a column, filling empty cells, or deleting rows with errors.
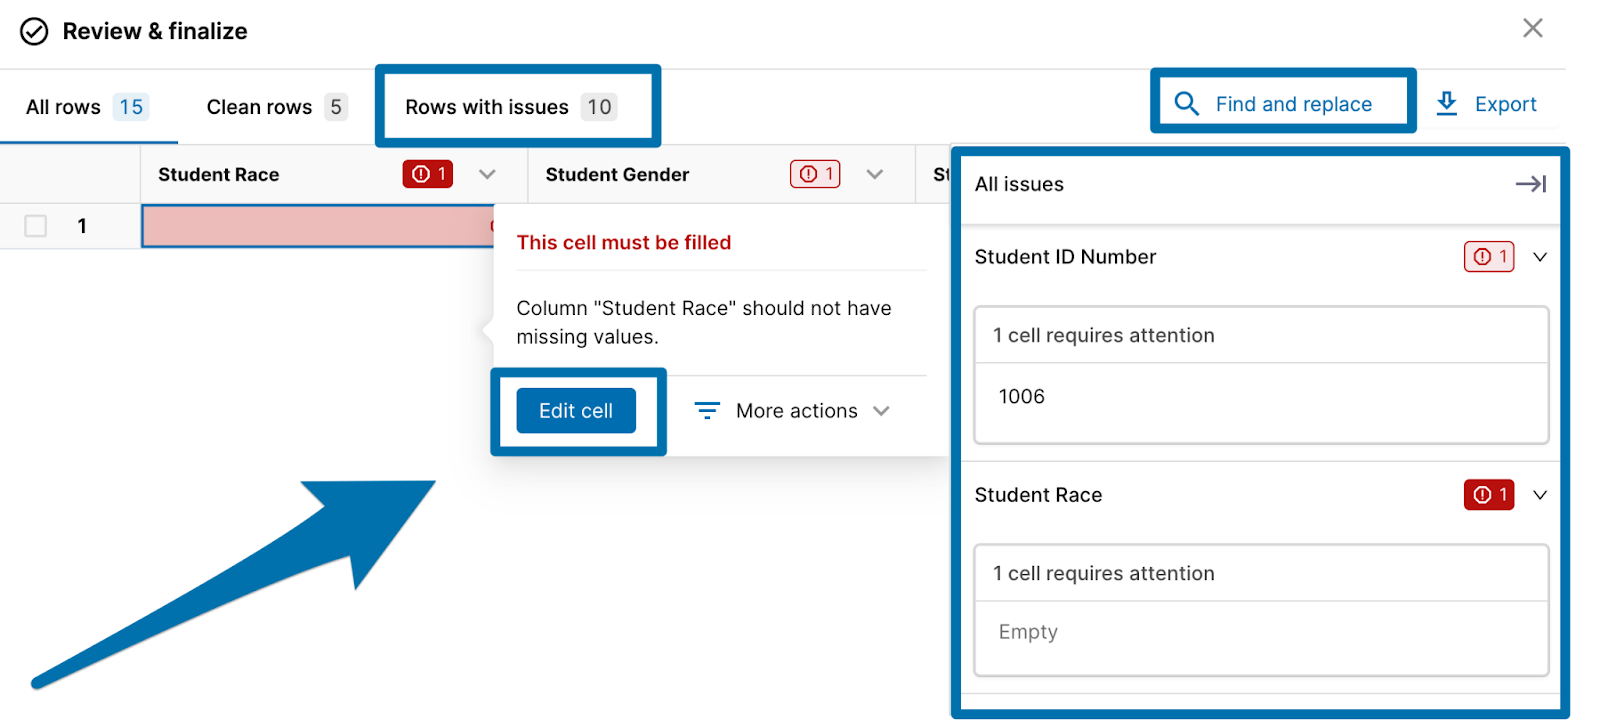
To make direct edits, click on Edit cell and enter the necessary information for the column.
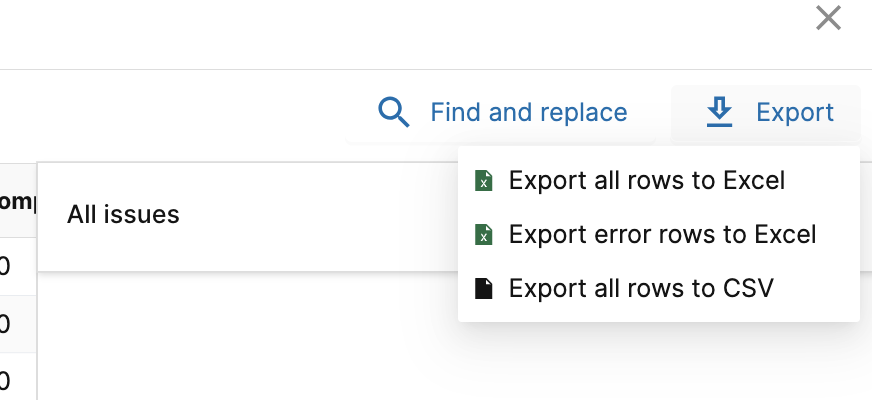
Additionally, you can choose to export the CSV file, edit it, and then re-upload it with the corrected data.
After the mapping is completed and all errors are corrected, click Import.
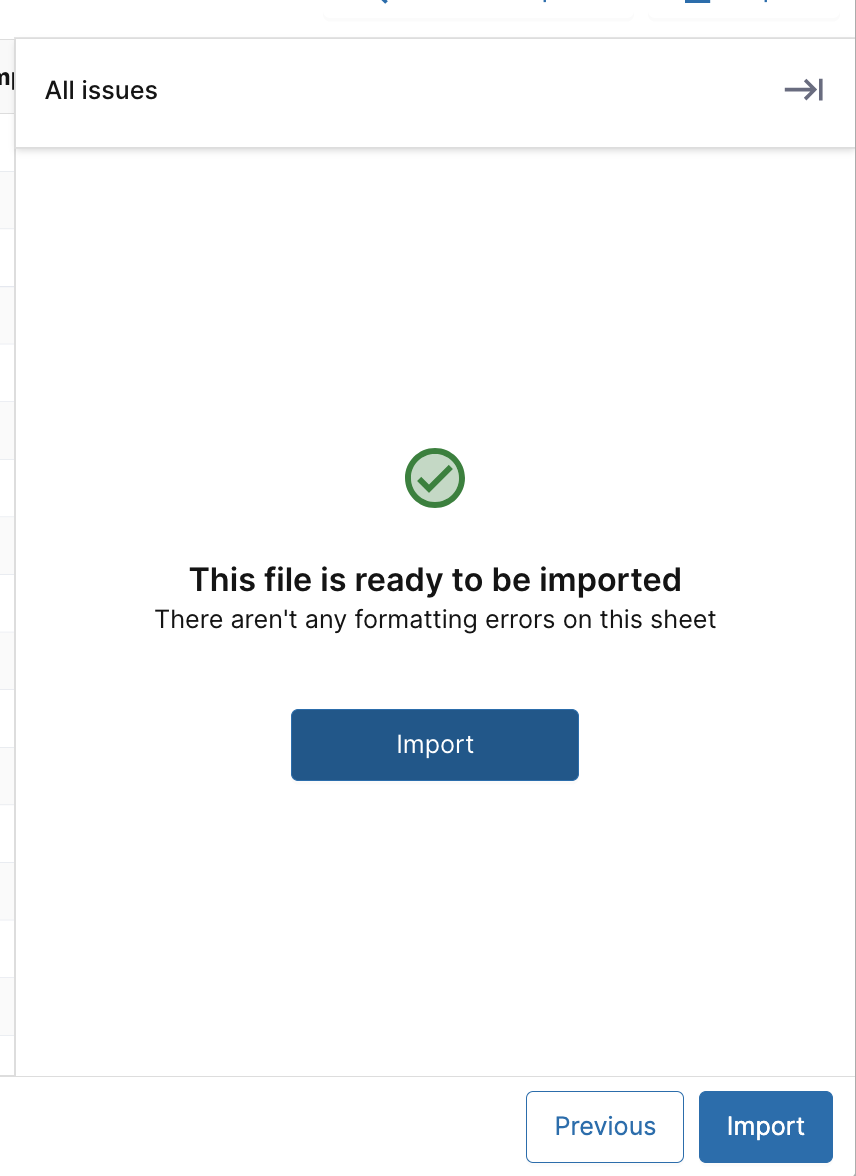
Once the data has been imported successfully, the window will automatically close and return to the Data Summary page.
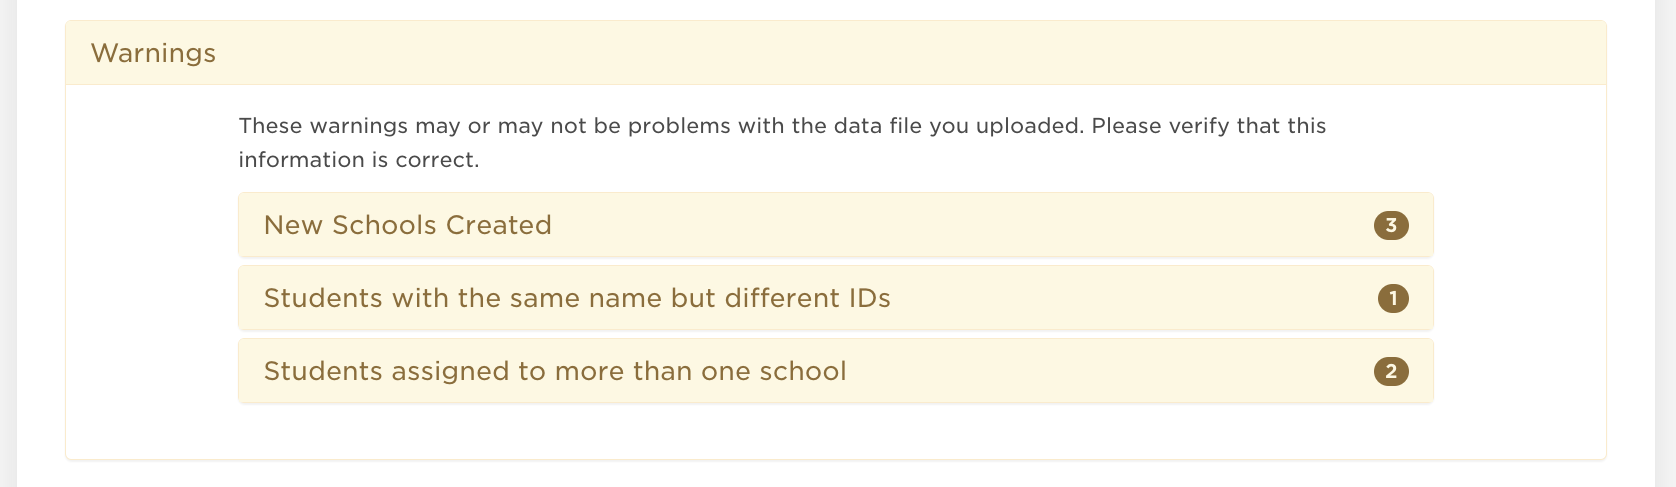
Read through this to make sure that the numbers of schools, students, employees, and family members matches what you expect as this summary is identifying what appears in your roster file. This is an important moment to pause and make sure no one is missing from the file. It is also possible that you might see errors or warnings to resolve before approving your survey.
Errors | Warnings |
If you see a red error when you upload your file, you must re-upload a corrected file before moving on. Common errors include having the same ID number associated with different individuals or invalid email addresses (may have a space or other typo). | Yellow warning do not require resolution but serve as flags that may require additional review. Common warnings include: students with different ID numbers that have the same name or students enrolled at multiple schools. If these scenarios are expected, the data upload process can continue. |
Note: Educators with Admin access now have ability to manage student participation from a survey administration. Learn more about this functionality in Panorama Academy.
Additional Resources
Use Teacher, Staff and Student Google Passwords to Access Surveys (Google SSO)
Note: The Google Single Sign-On (SSO) option is available only to a subset of our partner districts. Please reach out to your Panorama project team to check if this feature is available for your district.
If your district assigns Google email accounts:
Teachers, staff members, and students can access and respond to Panorama surveys using their Google passwords (Google SSO).
Using Google SSO:
Teachers, staff, and students do not need to enter an access code to access surveys.
They can simply click the provided link and enter their Google password to access a survey.
To enable Google SSO for surveys:Ensure student emails are imported as the access code in the Student Roster.
When teachers, staff, and students click the survey link:
The Google Sign-In page will appear. After logging in, they can access the available surveys. See some visuals of how this will look for students here.
If they click Exit or the survey times out, they can enter an access code or their Google password to access the surveys again.
Roster File Guides
Review the roster file guides below to learn what information required by our platform in order to successfully upload a roster file. Each guide also provides additional information and insights that may be helpful for reviewing reports. Understanding what is required within each column of your data file helps to identify specifically what is needed.
Frequently Asked Questions
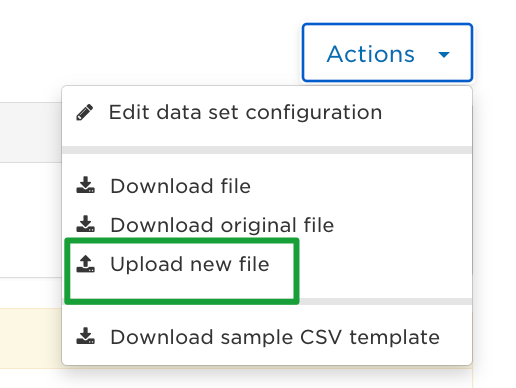
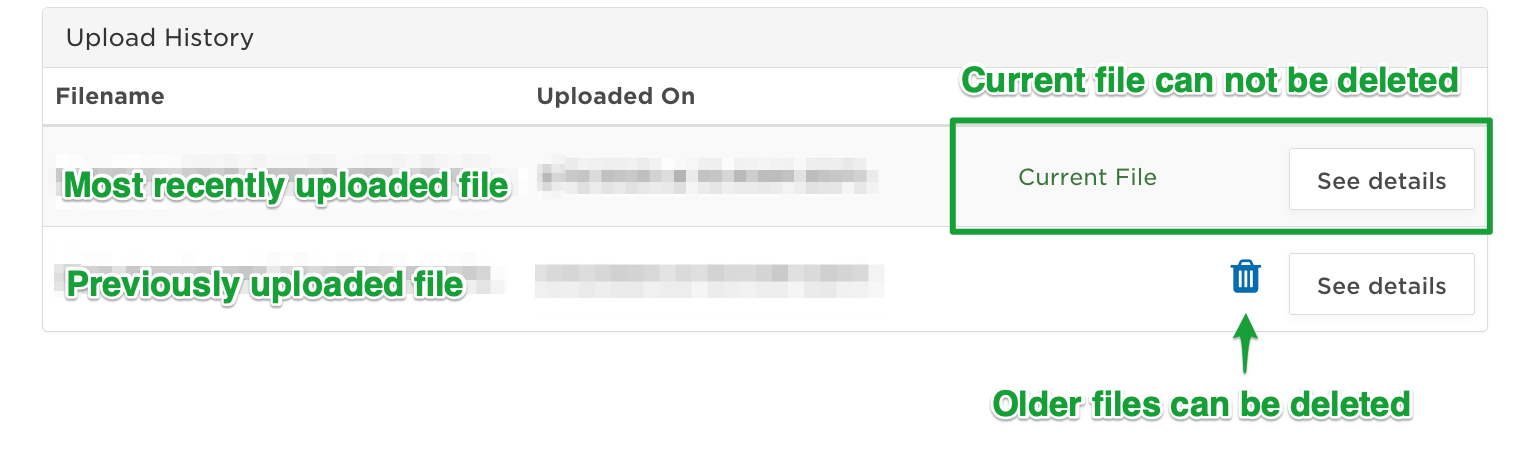
I accidentally uploaded the wrong roster file to the Rosters tab. Can I delete it?
You delete roster files only if they are not the current file in data sets. However, you cannot delete historical data sets at this time. If you’ve uploaded the wrong file, you can go to the Actions dropdown menu and select "Upload a new file." To delete a file that is not the current file, you can scroll to the bottom of the roster set page and click the trash can icon.