Roster File Data Quality Checklist
Last updated: June 23, 2026
In order to have your roster upload accepted by our platform, it's important to have data that is formatted correctly. The key steps to ensure roster file data quality include:
Matching Column Headers with the Data File Template
Reviewing and Correcting Errors Identified in Uploaded Files
and Reviewing the Data File Summary after Importing
Use the information on this page to prepare your file for upload and prevent common data file errors. Don't forget that you can always email your Panorama contact or support@panoramaed.com if you run into any issues! Download roster templates here.
1. Match your column headers with the data file template. IMPORTANT NOTE: Required headers will be listed in the 'Roster Data File Requirements' (Figure 1.).
Matching column headers is very important as it ensures the platform recognizes all data correctly. If your column headers do not match the template, the platform will think required information is missing. For example, label your column "Student First Name" instead of just "First Name" so that the information can be linked to the student.
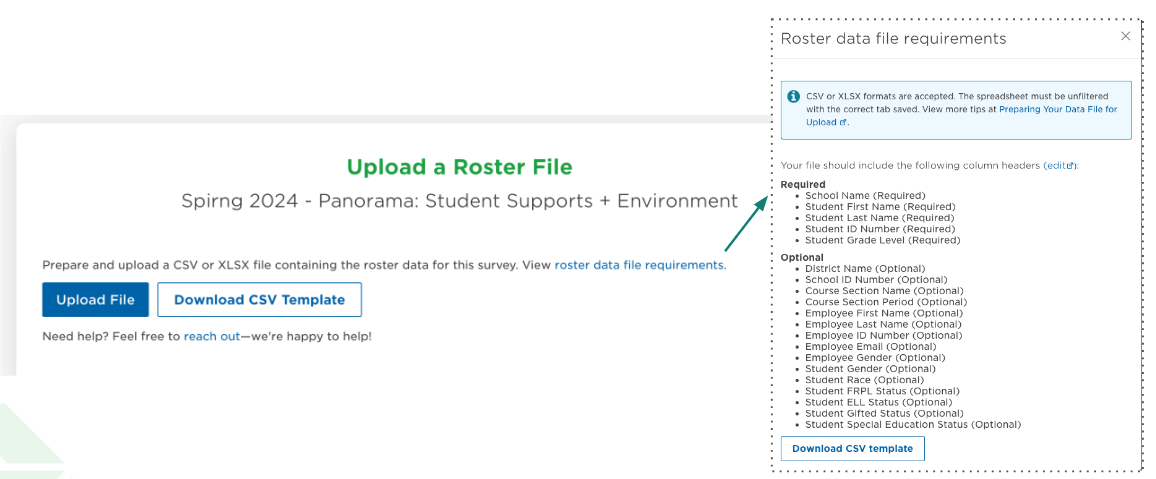
(Figure 1.)
When you upload your file (Figure 1.a), you will also have the opportunity to map columns that the platform doesn't recognize to make sure the data is read correctly (Figure 1.b).
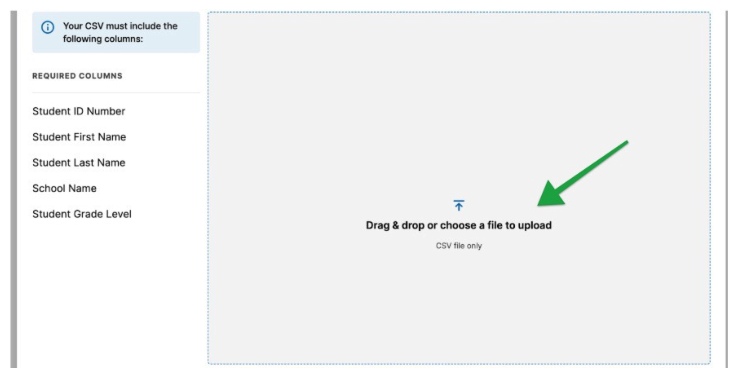
(Figure 1.a)
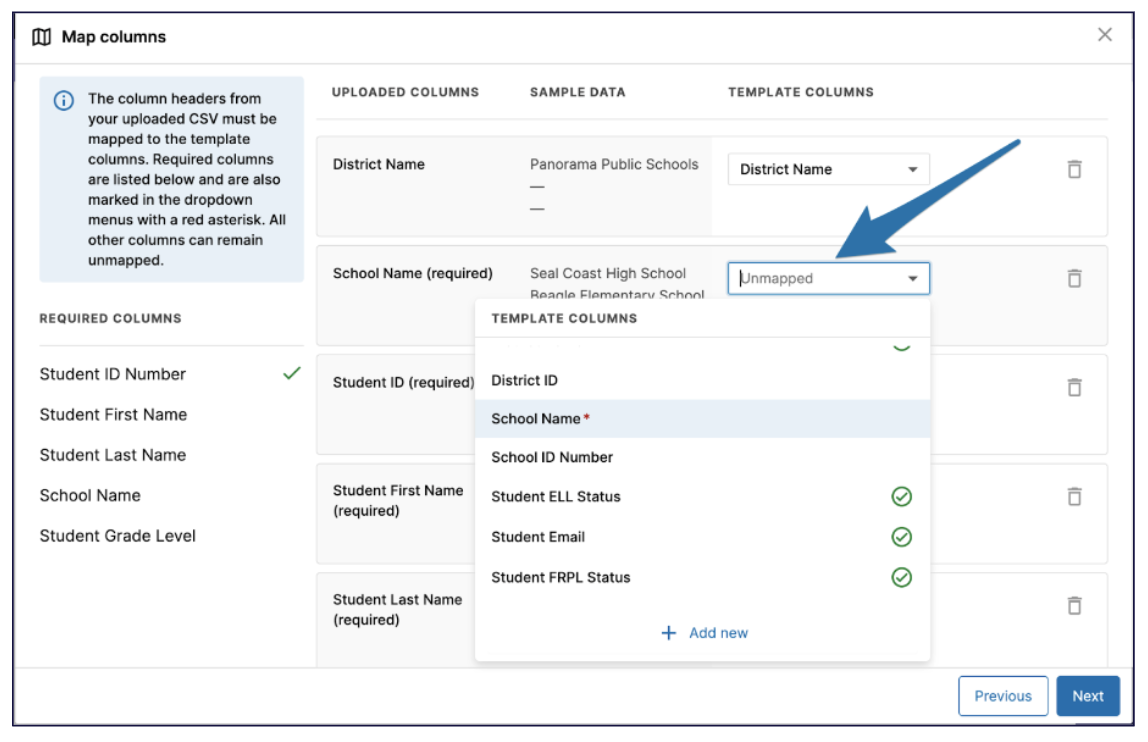
(Figure 1.b)
If a column name is missing, add a new column name by clicking '+ Add new'. Type in the new column name and select the file type (Figure 1.c).
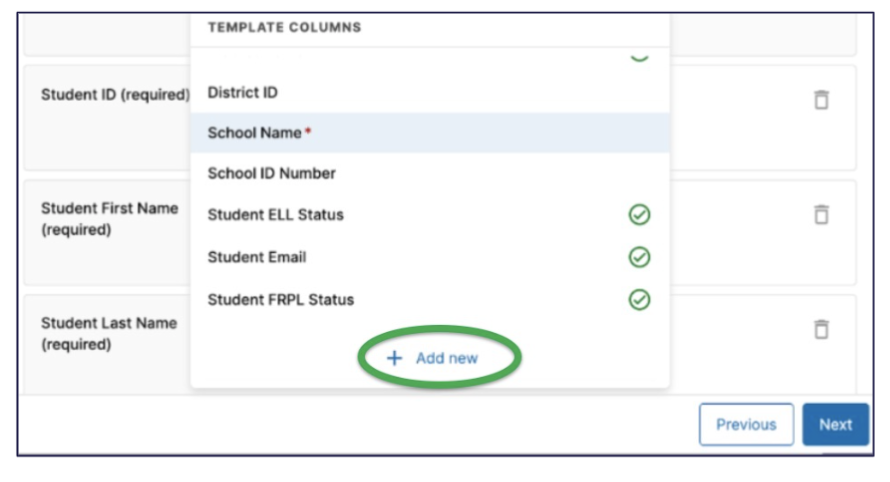
(Figure 1.c)
2. Review & Correct Errors. Once you have matched the uploaded columns with the template columns, you can check for any errors or inconsistencies. Errors will be marked in 'red' allowing you to review and correct them before proceeding (Figure 2).
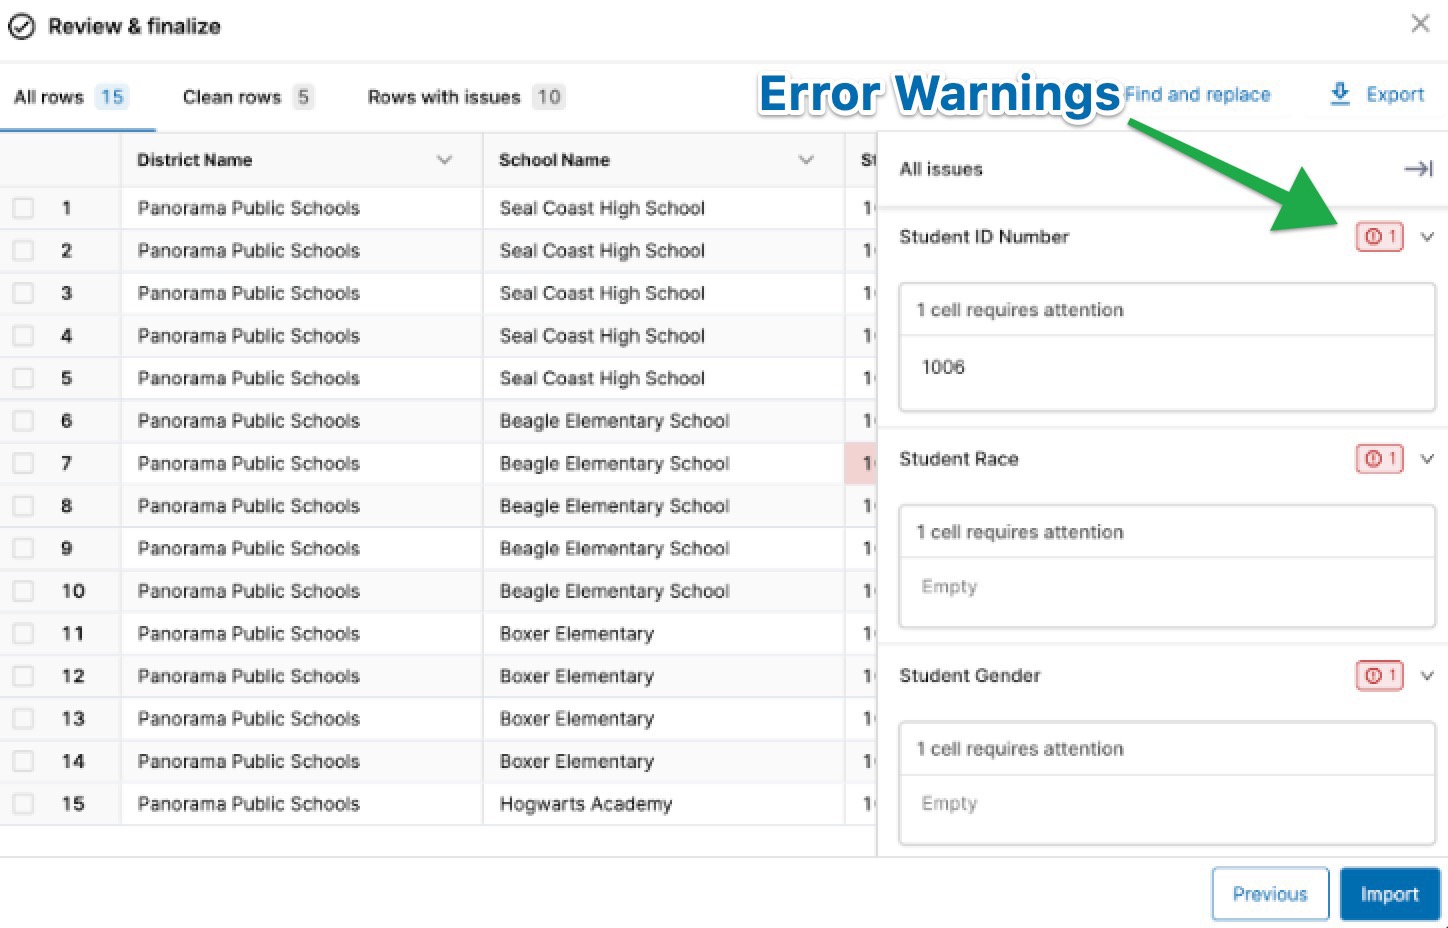
(Figure 2.)
You can edit within the cell or use the 'more actions' option to make bulk changes to the file (Figure 2.a). Here's where you can also:
Check that you have consistent personal information across all rows in your data file. Consistent name, email and demographic info ensures that surveys and reports represent accurate data about your community. If this data is incorrect, it could result in your community not receiving your messages about the survey, or being incorrectly identified.
Confirm you are using numeric values for grade levels. Only use K-12 to represent grade level. Avoid “grade 3” and “3rd”, for example.
Fill in blank cells in demographic columns. Using terms like "N/A" or "None" to note that demographic data does not apply to specific individuals allows you to disaggregate your reports based on this data. If the data point does not apply to any of your survey respondents, you can delete the entire column
Remove duplicate, empty, or incomplete fields. Check for and remove duplicate ID numbers, duplicate or empty email addresses, or email addresses that are incomplete. Missing or duplicate data will result in an error.
Remove all blank rows and columns from your data file. The data upload will stop at the first blank row in your file, so only the data appearing above this blank row will be imported. Blank columns may also cause an error.
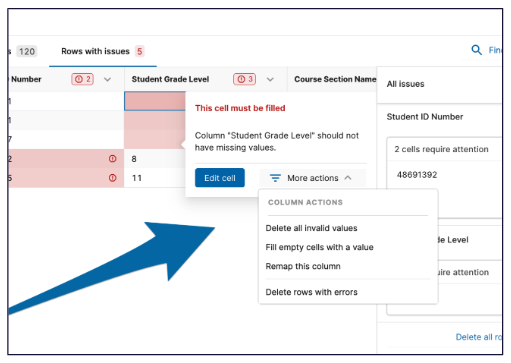
(Figure 2.a)
After mapping is complete, errors are corrected, and columns updated click 'Import' (Figure 2.b).
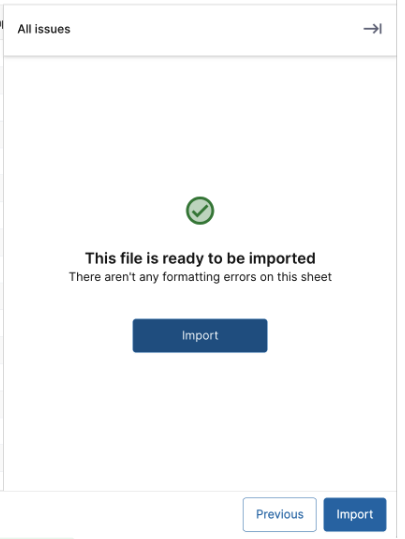
(Figure 2.b)
3. Review Data File Summary. Once the data has been imported successfully, the window will automatically close and generate a 'Data File Summary' (Figure 3.). After the summary is generated read through to make sure the number of schools, students, employees, and family members match what you expect as this is summarizing what appears in your roster file.
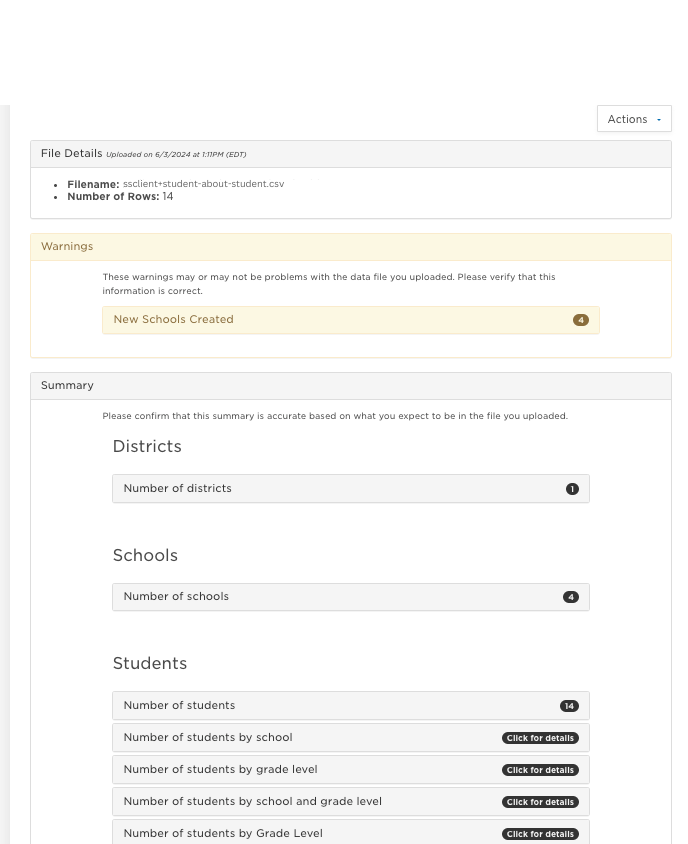
(Figure 3.)
IMPORTANT: Ensure that school and/or district names match any previous data uploads (Figure 3.a). If not, you’ll create a new school or district rather than adding to the existing one! This can negatively impact your reporting experience. When a roster is uploaded in the Roster tool, the platform will notify you if new schools have been created by checking against school names that already exist in the platform from previous uploads.
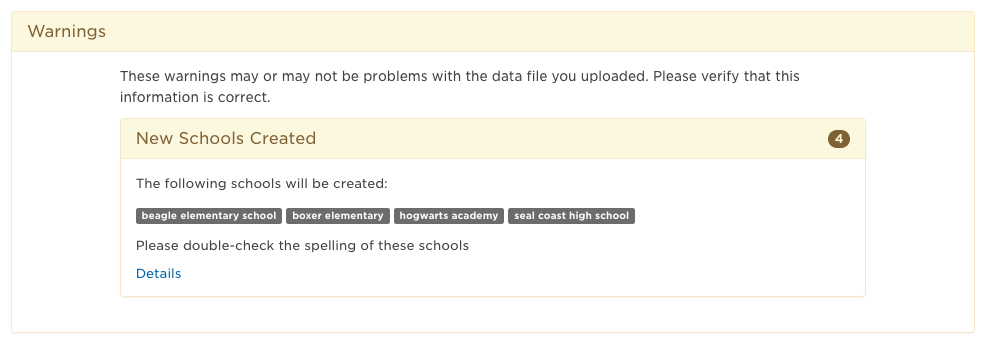
(Figure 3.a)
It is also possible that you might see errors or warnings (Figure 3.b) to resolve before approving your survey.
If you see a 'red error', you must re-upload a corrected file before moving on. Common 'red' errors include having the same ID number associated with different individuals or invalid email addresses (may have a space or other typo).
Yellow warnings do not require resolution but serve as flags that may require additional review. Common 'yellow' warnings include: students with different ID numbers that have the same name or students enrolled at multiple schools. If these scenarios are expected, the data upload process can continue.
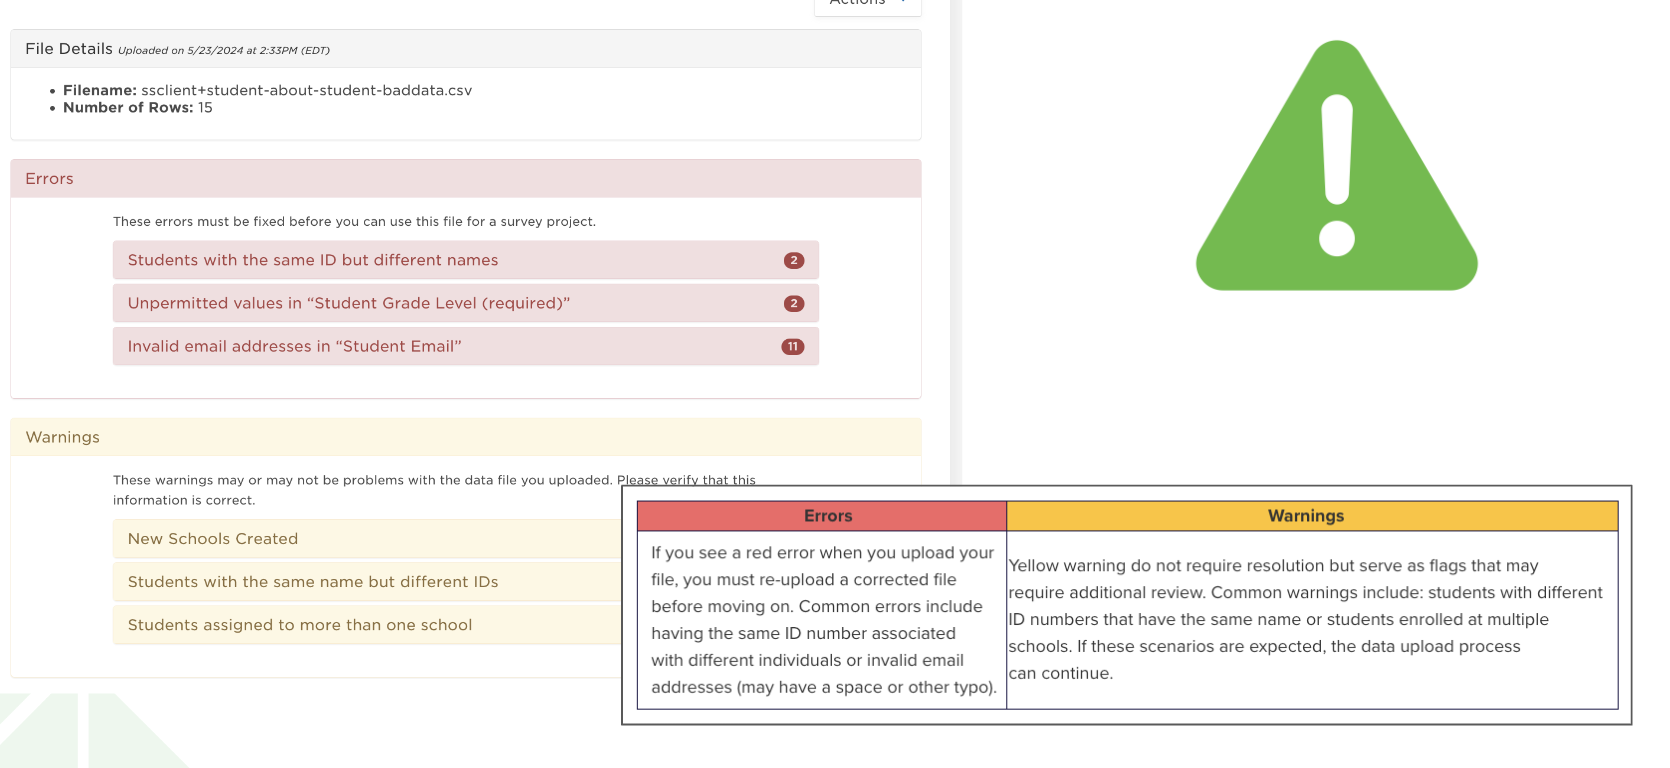
(Figure 3.b)
Have Questions or Need Support? Feel free to reach out to our support team at support@panoramaed.com.
Download roster templates here.
Feedback Surveys